The kid in me will always love a jack-o'-lantern. Not the belabored, competitive-neighbor versions that require hundreds of tiny, precise slits to reveal a perfect arching spider web—the classics: goofy, toothy grins with stem-hats akimbo. Shocked expressions, scary expressions, any face at all that Jim Carrey might have made in The Mask.
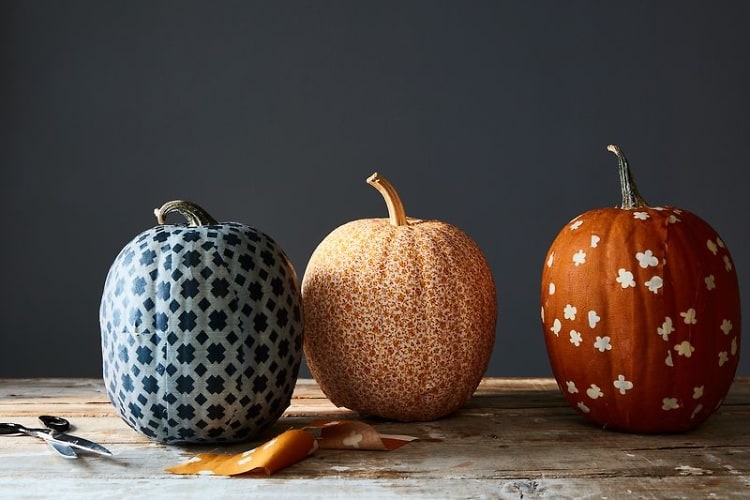
Simultaneously, I love when pumpkins are left alone to be pretty, grey-green and in a pile by a door or scattered along a runner with dried hydrangeas throughout. Somewhere in between these two extremes—a little playful, but in a Martha Stewart kind of way—is the fabric pumpkin.
I was inspired to try Mod Podge-ing fabric to pumpkins when I saw a similar DIY run rampant on Pinterest: Kristin Jackson's Dark Floral Pumpkin that she posted recently on Hunted Interior. To make it, she had a photograph professionally printed on a huge piece of paper, cut it into 1-inch strips, and adhered them with Mod Podge to a plastic pumpkin—and the result is a perfectly-lined up version of the photograph on the pumpkin. Seeing it, I thought: fabric! But I wanted to use real pumpkins that vary in height and girth, because then all members of a little crowd of three have distinct personalities. You'll cut wider strips and not worry too much about how they line up, which means that kids can help (and they can pick out a fabric they like, too). Plus, no sharp knives or pumpkin guts.
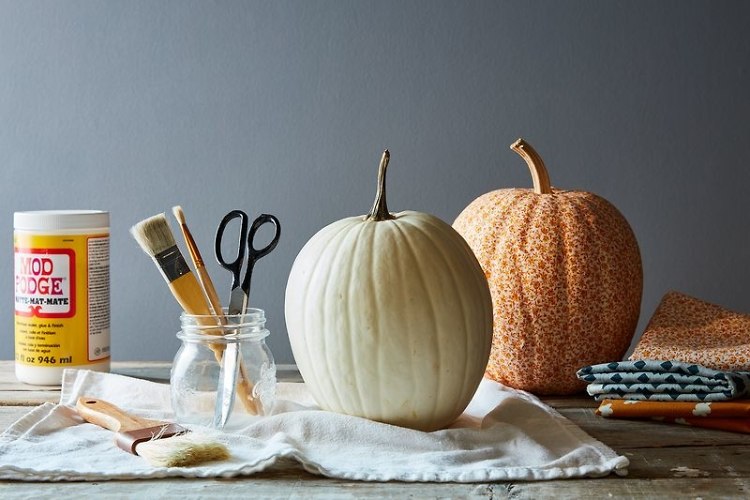
What you'll need:
-As many pumpkins as you like
-A wide, coarsely-bristled paint brush
-Mod Podge (about a cup per pumpkin; I chose the matte finish but you could go glossy)
-Sharp fabric scissors
-Any fabric you like (about a half-yard per pumpkin)
How To:
-Choose fabrics. I tested this process out with three different fabrics: One had a tiny, all-over floral pattern (the safest bet for any perfectionists or kids out there, it hides quirks better than plain fabric can) and the other two were much larger-scale and more graphic. I worried that the larger-scale patterns wouldn't work out as well, since pumpkins are round and patterns on fabric are not, but I was wrong. So long as you're comfortable with the patterns getting very lightly distorted—a patch-work representation of the original pattern, if you will—I say give them a go. (Just steer clear from any patterns that are larger than your pumpkin.)
-Cut them up. Cut about a dozen strips of fabric to be three inches wide and about the height of your pumpkin with good, sharp scissors so they don't start fraying immediately.
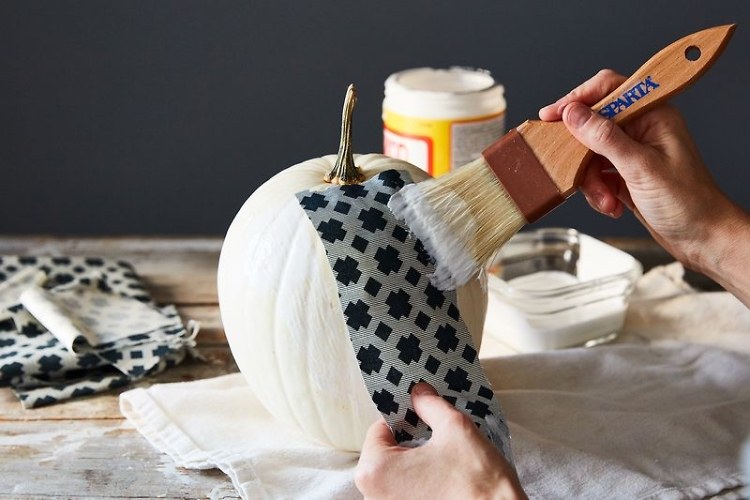
-Adhere the fabric. First coat a section of your pumpkin with Mod Podge (I elected a matte-finish tub of it, so the fabric would still look like fabric, but you could go glossy, too); lay a strip of fabric on it; and then paint over that with more Mod Podge. Use the brush to press the fabric so it adheres to the natural ridges in the gourd—you'll want to see their definition when it's dry. Make your way all around the pumpkin, laying the strips top to bottom but not minding if they overlap each other in places, until it's all covered. Set it out on a piece of parchment paper to dry overnight.
That's it! A great use for scraps of fabric you might be saving for an yet-decided purpose, or a reason to go by the fabric store in your hometown. (These three pretty fabrics came from the City Quilter, an excellent source for pattern-loving folk in New York City.)
Originally published on Food52

.jpg "How Comms Guru & Founder Of The PR Net Lisa Smith Put Her Stylish Stamp On The Industry")
.jpg "Who Are The Assoulines? Meet The Chic First Family Of Luxury Publishing")


.jpg "Who Is Nats Getty? The Oil Heir & Trans Activist Is Living Life Loud & Proud")
.jpg "Worldly Socialite Haya Maraka's Elegant Etiquette Tips For The Modern Lady")
.jpg "Haute Hostess Christine Chiu's Guide To Throwing The Most Fabulous Fête")


.jpg "Inside The Hottest Halloween Bashes On The NYC Social Scene This Weekend")
.jpg "The Most Stylish Last-Minute Costume Ideas To DIY This Halloween")